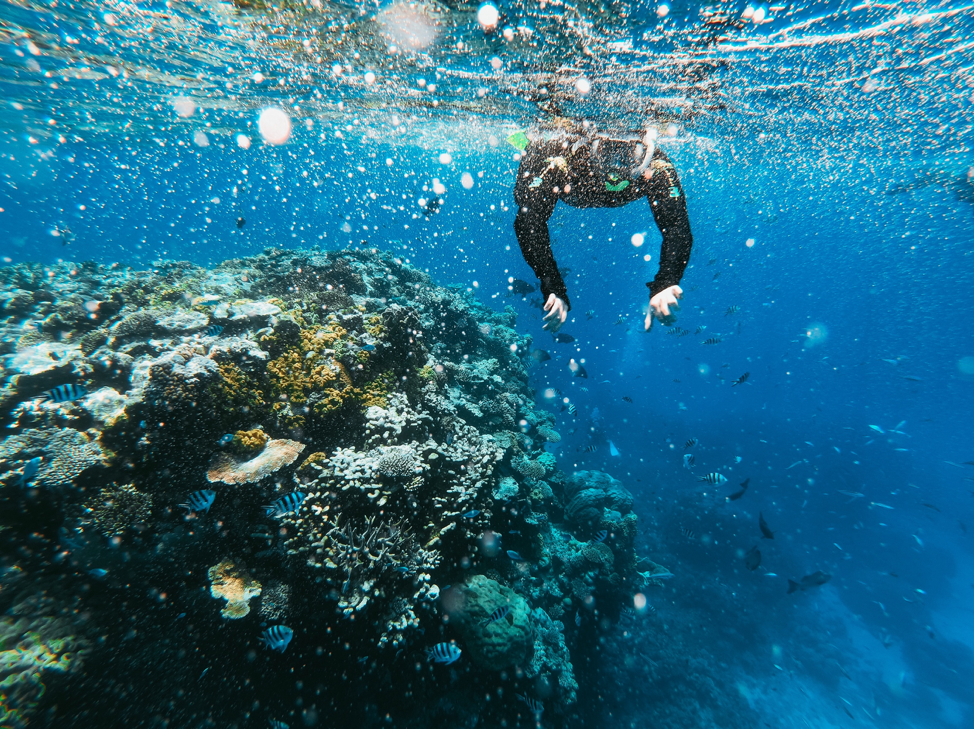
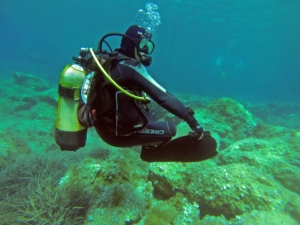
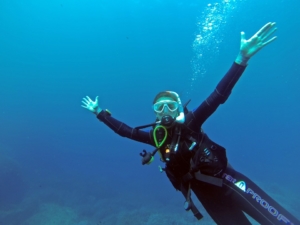
Diving can be classified as either open circuit or closed circuit depending on the type of breathing apparatus used. While the former is most common, advanced divers often switch to a closed-circuit breathing apparatus. Regardless of your skill level, though, you might be wondering how they differ from each other. Today, we’re going to take a closer look at open-circuit and closed-circuit diving, revealing the unique characteristics and benefits of each method.

What Is Open-Circuit Diving?

Open-circuit diving involves the use of a traditional breathing apparatus, known as a regulator, in which no gas is recycled. Most divers use a gas mixture consisting of 21% oxygen, 78% nitrogen and 1% other gases (e.g. argon). Other divers use a gas mixture consisting of more than 21% oxygen. Regardless, in open-circuit diving, divers don’t recycle any of the gas they breathe.

Regulators used in open-circuit diving aren’t designed to recycle or reuse gas. The gas is stored in a tank. When you inhale through the regulator, the gas travel will travel from the tank to your regulator. When you exhale, the gas will typically be released into the surrounding sea. The only exception is if you are wearing a buoyancy control device (BCD), in which case the gas may be transferred to the wearable BCD to increase your buoyancy.

The defining characteristic of open-circuit diving is that no breathing gas is recycled. It goes from the tank into your lungs, and when you exhale, it’s either released into the surrounding sea or transferred to your BCD.

What Is Closed-Circuit Diving?

Closed-circuit diving, on the other hand, involves the use of a rebreather, as well as other equipment, that recycles some or all of the breathing gas. Rebreathers contain a mouthpiece through which you inhale and exhale while underwater. When you inhale, gas will travel from your tank to your mouthpiece — just like it does with open-circuit regulators. When you exhale, however, gas doesn’t go into the surrounding sea. Instead, it’s transferred back into your tank so that you can reuse it.

A rebreather is more than just a mouthpiece; it’s an entire system used to provide and recycle breathing gas. Exhaling through the mouthpiece of a rebreather sends the gas in your lungs to a rebreather component known as a carbon dioxide scrubber. Here, the scrubber removes carbon dioxide from the gas before sending it to the counterlungs.

A typical closed-circuit rebreather consists of the following components:

  • Mouthpiece: The mouthpiece, of course, is a component through which you inhale and exhale. Like other mouthpieces, you wear it by biting down on the top and bottom with your teeth.
  • Hoses: Rebreathers have several hoses that are used to provide the diver with gas and recycle the diver’s used gas. They are typically made of durable but flexible synthetic rubber. Rebreather hoses connect the mouthpiece to other components like the tank and counterlungs.
  • Counterlungs: Another essential rebreather component is the counterlungs. The counterlungs assist divers with inhaling and exhaling gas by maintaining the same pressure as the diver’s lungs (tidal volume).
  • Carbon Dioxide Scrubber: As mentioned earlier, the carbon dioxide scrubber is a component of a rebreather that’s designed to remove carbon dioxide from the gas exhaled by the diver. When you exhale, you won’t breathe out the same amount of oxygen that you inhaled. Rather, you’ll breathe out more carbon dioxide and less oxygen. This is because our bodies run on carbon-based sources of energy. To remove carbon dioxide from exhaled gas, rebreathers use a carbon dioxide scrubber.
  • Over-Pressure Valve: While not used in all rebreathers, some closed-circuit breathing apparatuses feature an over-pressure valve. Mounted on the counterlungs, the over-pressure valve allows the diver to release gas in the breathing circuit when he or she is ascending. If gas remains trapped in the circuit, ascending will cause the gas to expand and, therefore, increase the risk of critical equipment failure.
  • Gas Tank: All rebreathers must have a gas tank in which the breathing gas is stored.

The defining characteristic of closed-circuit diving is that some or all of the breathing gas is recycled. This is in stark contrast to open-circuit diving, in which no breathing gas is recycled.

Benefits of Open-Circuit Diving

For beginners, open-circuit diving is always recommended because of its simplicity. An open-circuit regulator is simple and easy to use. You don’t have to worry about components like the carbon dioxide scrubber or over-pressure valve failing, nor do you have to worry about maintaining or replacing those components. As a result, it’s a safer choice for beginners to the sport of diving.

Another benefit of open-circuit diving is its low cost of equipment. Open-circuit regulators are inexpensive, with some models costing just $200. In comparison, rebreathers are much more expensive. It’s not uncommon for rebreathers to cost over $5,000. This is because rebreathers contain more parts than regulators.

Benefits of Closed-Circuit Diving

Although it’s more complex and difficult than open-circuit diving, closed-circuit diving offers several advantages, one of which is an increased bottom time. According to a study published in the Marine Technology Society Journal, closed-circuit divers consume 17 times less gas than open-circuit divers. With the gas being recycled, closed-circuit divers can stay underwater longer than their open-circuit counterparts.

A rebreather system may cost more than a traditional open-circuit regulator, but don’t let that fool you into thinking closed-circuit diving is more expensive. The same study cited above found that closed-circuit divers spend seven times less money on gas and other “expendables” than open-circuit divers.

There are also certifications you can take to improve your proficiency in closed-circuit diving. The Professional Association of Diving Instructors (PADI), for example, offers the Rebreather Diver Course. If you’ve passed the PADI Open Water Diver Course and the PADI Enriched Air Diver Course, you can enroll in this course, assuming you are at least 18 years old and have 25 or more logged dives. This comprehensive course will teach you the mechanics of closed-circuit diving, including how to check your rebreather equipment, how to perform bubble checks, optimizing your BCD, monitoring gauges and more.

In addition to the PADI Rebreather Diver Course, Technical Diving International (TDI) offers the Closed Circuit Rebreather (CCR) Air Diluent Diver Course. To enroll in the TDI CCR Air Diluent Diver Course, you’ll need to have certification in the TDI Nitrox Diver Course, be 18 years of age or older and have a minimum of 20 logged dives. In this course, you’ll learn about the history of breathers, how they compare to open-circuit regulator, dive tables, equipment procedures and more. Enrolling in a closed-circuit diving course like the PADI Rebreather Diver Course or the TDI CCR Air Diluent Diver Course requires an investment of both your time and money, but it can help you become a better, safer closed-circuit diver.

The Bottom Line on Open-Circuit and Closed-Circuit Diving

Diving requires the use of a breathing apparatus that transfers gas to a mouthpiece. In open-circuit diving, the regulator doesn’t recycle any of the used gas. In closed-circuit diving, the rebreather recycles some or all of the used gas.

Both open-circuit and closed-circuit diving offer their own unique advantages. Beginners, however, should always start with open-circuit diving because of its simplicity. Only after mastering the use of an open-circuit regulator should you consider closed-circuit diving.

Want to create your own custom dive logs? Contact us today to learn more about our custom dive logs.

It’s a problem that nearly all divers will encounter during their underwater adventures: a flooded mask. When water sneaks past the outer seal, it will enter the mask’s interior. While a small amount of water shouldn’t cause any need for concern, too much water can interfere with your vision. As a diver, you should familiarize yourself with the steps to clearing a flooded dive mask. Whether you’re training in the pool or performing a full-fledged dive off the coast, you can use this skill to quickly expunge water from your dive mask.

The Basics of Dive Masks

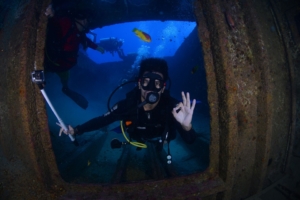
Also known as a scuba mask, a dive mask is a piece of wearable diving equipment that’s used primarily to improve vision while underwater. When worn, it covers both your eyes and nose. Without a dive mask, your eyes will be exposed to the saltwater (or freshwater, depending on where you are diving). And because exposure to water prevents light from focusing on the retina of your eyes, you won’t be able to see very well.

A dive mask can enhance your vision while underwater, however, by creating a small amount of space between your eyes and the water. With just 1 inch of space separating your eyes from the water, light can focus on your focus on the retina of your eyes, thereby improving your vision.

What to Expect When Your Dive Mask Floods

There are dozens of types of dive masks, though most are made of silicone, rubber, tempered glass or plastic. Regardless of type, all dive masks are designed to prevent water from reaching your eyes.

Unfortunately, it’s not uncommon for water to leak into a dive mask. Known as flooding, it often occurs at the most inconvenient time. You might be 130 feet below, only to see and feel water slowly filling the inside of your dive mask. As the water level inside your dive mask climbs, it will reach your nose, followed by your eyes. Other factors can affect your underwater vision, such as current strength and the presence of sediment on the ocean floor, but you’ll struggle to see far or clearly if your dive mask floods.

Loss of vision aside, a flooded dive mask can induce a sense of panic. Depending on your depth, you may not have the luxury or quickly resurfacing to dump the water out of your dive mask. When this realization strikes, it can leave you feeling stressed and anxious, which goes against one of the top safety rules of diving: always stay calm. Anxiety doesn’t just increase your risk of making mistakes; it increases your respiratory rate, meaning you’ll consume more air.

Step #1) Take a Deep Breath Through Your Regulator

When your dive mask floods with water, calmly take a deep breath through your regulator. As you may know, the regulator is a separate piece of equipment that delivers air through a mouthpiece. Even if your dive mask floods with water, you can still breathe thanks to the regulator. And the first step to clearing a flooded dive mask is to take a deep breath through the mouthpiece and hold it.

How does taking a deep breath through your regulator help to clear a flooded dive mask exactly? The mask-clearing method described here involves pushing water out of your dive mask by exhaling. In order to exhale, though, you’ll need adequate air in your lungs. Once you’ve taken a deep breath, you can exhale to clear your flooded dive mask.

Step #2) Press on the Top of Your Dive Mask

After inhaling through your regulator, press down on the top of your dive mask with one or both hands. You should press down on the outer top rim of your dive mask rather than the transparent front. The purpose of pressing down here is to direct the water out through the bottom of your dive mask. If you don’t press down on the bottom of your dive mask, exhaling may break the upper seal of your mask, allowing more water to enter. Obviously that would be counterproductive to what you are trying to achieve, so press on the top of your dive mask around the rim.

Step #3) Exhale Through Your Nose

The third and final step to clearing a flooded dive mask is to exhale through your nose. While still pressing down on the outer top rim of your dive mask, steadily exhale through your nose using moderate force. When performed correctly, this will force the collected water out of your dive mask.

Keep in mind that you may have to repeat these steps several times. If your dive mask is only 20% flooded, one or two strong exhales should clear it. If your dive mask is completely flooded, however, it may take a half-dozen or more exhales.

Tighten the Strap

If you discover that your dive mask is constantly flooding with water, try tightening the strap. Not surprisingly, a loose strap is one of the leading causes of flooded dive masks. When it’s loose, your dive mask won’t be able to create a waterproof seal around your face. It may only leak under certain conditions, such as when ascending or descending, or it may leak all the time. To reduce the risk of your dive mask leaking, adjust the strap so it’s relatively tight around your head. Just remember not to make it too tight, as this can cause discomfort or pain.

Clean the Skirt

Another tip to prevent water from leaking into your dive mask is to clean your mask’s skirt. The skirt is a band of soft material, usually synthetic rubber or silicone, around the inside perimeter of a dive mask that acts as a waterproof seal. Over time, dirt, debris or oils from your skin will accumulate on the skirt. If you dive mask’s skirt becomes too dirty, water may leak past it. To clean your dive mask’s skirt, wipe it with a wet washcloth and a small amount of liquid dish soap. You don’t have to clean the skirt every time you go diving, but you should get into the habit of cleaning it on a regular basis. By keeping the skirt clean, water is less likely to enter and flood your dive mask.

Switch to a Full-Face Dive Mask

When all else fails, consider switching to a full-face dive mask. Full-face dive masks cover your entire head, and many of them feature a drain valve that’s designed specifically to remove water. Just engage the drain valve, at which point water will flush out the mask. Some full-face dive masks even have an automatic clearing function in which you tilt or raise your head to remove water. Full-face dive masks are larger and bulkier than traditional dive masks, but they are less likely to flood with water than their counterparts.

Don’t let a flooded dive mask prevent you from enjoying your dives. When water begins creeping into your dive mask, use the three-step technique described here to clear it. Alternatively, switch to a full-face dive mask with a drain valve. By keeping your dive mask free of water, you’ll have a safer and more enjoyable experiencing when diving.

Want to create your own custom dive logs? Contact us today to learn more about our custom dive logs.

While covering less than 1% of the ocean floor, coral reefs are among the most diverse ecosystems in the world. Approximately one-quarter of all marine species like in or around coral reefs, including fish, algae, shrimp, mollusks, sponges, clams, crabs, worms and more. As a result, coral reefs have become popular dive sites. With their unparalleled level of biodiversity, you’ll encounter countless forms of marine life when diving around a coral reef. Whether you’re planning a dive trip to the Great Barrier Reef, the Amazon Reef, the Tubbataha Reef or any other coral reef, though, you should follow these 10 rules.

#1) Look But Don’t Touch

The golden rule of diving around a coral reef is to look but don’t touch. You can marvel at these intricate underwater structures — and you can take photos or record videos of them — but you should never touch them. Certain species of corals are razor sharp, and touching them could result in serious bodily injury. Furthermore, corals have a delicate, living membrane covering their calcified skeleton. If you touch this membrane — with any part of your body or an object — you may inadvertently pierce it, leaving the coral susceptible to infection.

#2) Inquire About Dive Group Size

Before diving around a coral reef, contact either a private or municipal tourism organization to find out how large your dive group should be. Why does this matter? Large dive groups are more likely to damage or disturb corals and their respective marine life than smaller dive groups. The Australian government’s Great Barrier Reef Marine Park Authority recommends diving in groups of no more than six people. Other government-run marine departments may recommend even smaller dive groups for their coral reefs. By following the recommendations for your coral reef dive site, you’ll reduce your group’s environmental footprint.

#3) Stay Off the Bottom

While most divers know not to touch corals, many assume that it’s okay to walk on the ocean floor if there are no corals growing on it. The problem with walking on the ocean floor around corals, however, is that it stirs up sediment, which eventually lands on corals. Corals are porous, consisting of a honeycomb-pattern of small holes in which algae lives. If you walk along the bottom of the ocean floor next to a coral, some of the sand and sediment will coat the coral and clog its pores. When this happens, algae won’t be able to make its way inside the coral. And because algae is the main source of food (energy) for corals, this often leads to bleaching and eventually the death of corals.

If you find yourself sinking to the bottom, consider using a buoyancy compensator. Also known as a buoyancy control device (BCD), this inflatable vest will provide you with greater buoyancy control while underwater. Using the BCD’s control mechanic, you can increase or decrease the amount of air in it. With our air, the BCD will make you more buoyant. With less air, it will make less buoyant.

#4) Don’t Feed the Fish

You’ll probably encounter dozens of fish species when diving around a coral reef. Regardless of which species you encounter, though, you shouldn’t feed them. Lots of fish live around coral reefs because they eat the plants and algae growing on corals. If you feed the native fish — and other divers follow suit by feeding them as well — they may stop feasting on the corals’ plants and algae. Over time, the plants and algae grow out of control, taking over the coral and disturbing its natural ecosystem.

#5) Secure Your Equipment

Double check your equipment before diving around a coral reef to ensure that it’s not loose. If you’re using a weight belt, for example, make sure the individual weights are secured to the belt. If a weight is loose, it could fall onto a piece of coral. Of course, you should secure all your diving equipment. Anything that falls onto or even brushes against a coral may cause serious damage to it.

#6) Keep a Safe Distance From Marine Life

Always keep a safe distance from marine life when diving around a coral reef. As with corals, you shouldn’t touch any marine life that you encounter during your dive. Some seemingly harmless species of fish are actually venomous, and touching them could result in debilitating pain or even paralysis. Even if a fish isn’t venomous, touching it may harm the mucus membrane covering its scales. Whether it’s a fish, crab, lobster or any form of marine life, keep your distance to avoid disturbing it.

#7) Wear Gloves

Some divers believe it’s best to leave their gloves on the boat when diving around a coral reef, as brushing against a coral with gloves could damage it. This isn’t technically wrong. Touching a coral with either your bare hand or a gloved a hand may damage it. Nonetheless, you should still wear gloves when diving around a coral reef to protect your hands from injury. Hopefully your hands never touch the coral, but if you accidentally brush a hand against it, wearing gloves could prevent serious cuts or burns.

#8) Research the Marine Life Before Diving

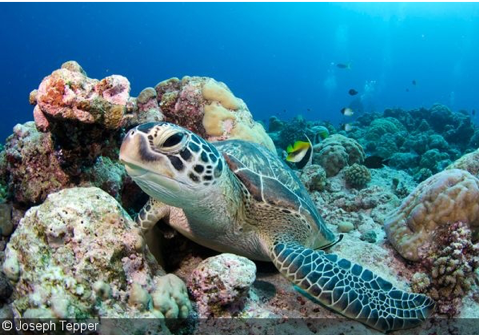
Assuming this is your first time diving around a particular coral reef, you should spend some time researching the local marine life. No two coral reef systems have the exact same species of marine life. If it’s your first time diving at a coral reef, you’ll encounter a myriad of unfamiliar marine species. By researching the coral reef’s marine life, though, you’ll a better idea of what to expect.

#9) Choose a Reputable Dive Charter

You shouldn’t choose just any dive charter to take you out to a coral reef. Many fly-by-night dive charters are careless with their operations. Some, for example, may drop anchor without first checking to see if there’s coral underneath. And if the boat drops anchor directly over a coral, it will crush and destroy the underlying coral.

How do you know if a dive charter is reputable? You can always ask the locals for recommendations, although another way to verify the reputation of a dive charter is to look on TripAdvisor. Using the online review website, you can read firsthand experiences from the charter’s past customers. If there’s a high ratio of positive-to-negative reviews, you can rest assured knowing the dive charter is a reputable and credible business. If the ratio is reversed, you may want to book your dive elsewhere.

#10) Use Mineral-Based Sunscreen Lotion

Choose a mineral-based sunscreen lotion to wear when diving around a coral reef. In 2019, Hawaii became the first state to ban sunscreen lotions containing either oxybenzone or oxctinoxate. While these two chemicals have been uses in sunscreen lotions for decades, new studies have linked them to coral bleaching, which is the basis for Hawaii’s recent ban of sunscreen lotions containing oxybenzone or oxctinoxate. Beginning 2021, Hawaii businesses won’t be allowed to sell sunscreen creams, lotions, sprays or other products if they contain one of these ingredients.

If you’re going to wear sunscreen lotion during your dive trip, choose a lotion containing a mineral-based UV-filtering ingredient like zinc oxide. They are just as effective at protecting against sunburn and related UV-related skin damage, but they won’t induce bleaching in coral reefs.

Want to create your own custom dive logs? Contact us today to learn more about our custom dive logs.

Solo Diving: Is It Safe to Dive Without a Buddy?

After learning the basics of diving, you might be wondering whether it’s safe to dive alone. Known as solo diving, it’s a hot topic among professional and recreational divers alike. Some believe it’s a safe and acceptable practice, whereas others believe it’s too dangerous and, thus, should be avoided. So, before you go diving without a buddy, you should read the following about solo diving its associated risks.

The History of Solo Diving

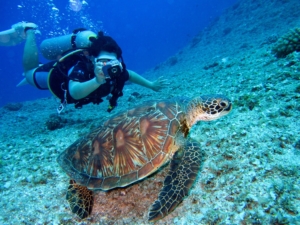
People have been diving alone for thousands of years. In Ancient Mesopotamia, archeological evidence shows that fishermen would dive alone to spearfish and collect oysters. The Greek poet Homer even referenced the act of solo diving in several of his poems, which are believed to have been published in the 6th to 8th century B.C. It wasn’t until the mid-1900s, however, when the buddy system was introduced to promote safer diving.

During the 1950s and 60s, divers were encouraged to dive with at least one other competent diver or “buddy” to reduce the risk of injury. In the years to follow, the buddy system became a fundamental philosophy of recreational diving. With divers submerging and exploring their underwater environments in groups of two or more, it lowers the risk of injury. If a diver experiences an emergency, another diver will be nearby to provide assistance. Divers can also alert their others to potential hazards using hand gestures or an underwater writing slate.

While the buddy system is still used in diving, solo diving has become more acceptable in recent years. In 1999, Scuba Diving International (SDI) launched the first officially recognized solo diving certification course. More recently, in 2011, the Professional Association of Diving Instructors (PADI) launched its own solo diving certification course. Therefore, it’s safe to say that the industry’s perception of solo diving has evolved over the years. When planned and executed properly, solo diving is no longer considered a dangerous activity, and you even become certified for solo diving by enrolling a reputable course.

Why Should I Go Diving Alone?

Using the buddy system requires you to dive simultaneously with at least one other competent diver. But what if your buddy isn’t available on the date when you want to dive? If your buddy isn’t free, you won’t be able to dive — not without diving alone, at least. Solo diving allows you to dive on your own schedule. Whether it’s the middle of the week or a weekend, you can dive whenever you please.

Some divers feel more stressed when diving in groups of two or more as opposed to diving alone. When you dive with a buddy, you’ll be required to watch over him or her and vise versa. If your buddy lacks your level of training and experience, you may somewhat burdened knowing that he or she is your responsibility. Solo diving eliminates this burden. The only person you’ll have to look out for when diving alone is yourself.

You’ll have more freedom to do what you want to do when diving alone than with a buddy. Maybe you want to take pictures of a brilliantly colored coral reef, or perhaps you want to check out an underwater structure like a sunken ship. Regardless, solo diving gives you the freedom to choose your own underwater activities. If you go diving with a buddy, on the other hand, you’ll have to spend at least some of your time underwater following him or her. When your buddy wants to venture to a different area, you must follow him or her while placing your own activities on the back burner.

Disadvantages of Solo Diving

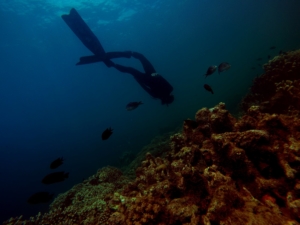
Although there are plenty of reasons to consider solo diving, there are still some disadvantages worth mentioning. Without a buddy, the risk for injury or even death is greater if you experience a health event when solo diving. According to PADI, nearly half of all diving-related fatalities involve a health event. While a health event can strike regardless of whether you dive alone or with a buddy, the chance for a positive outcome is higher if there’s another diver nearby.

You won’t have the luxury of using your buddy’s equipment if your own equipment fails when diving alone. Diving with a buddy ensures redundancy in the event of equipment failure. If your air tank suddenly stops working, for instance, you can gesture to your buddy to use his or hers until you are able to safely resurface. When diving alone, you’ll only have access to the equipment you bring or wear. If it stops working — and you don’t have a backup on hand — you may find yourself in serious danger.

Solo diving prevents you from sharing your experience with other people. Diving with a buddy means that you and your buddy will have the same experience. Upon resurfacing, you can converse with your buddy while discussing the sights and sounds the two of you encountered. Solo diving, unfortunately, means you won’t be able to share your diving experience with anyone else.

There’s no one available to sign or stamp your dive log when solo diving. You can record your solo dives in a dive log, but you won’t be able to have those logs verified by a third party. If you’re trying to reach a specific number of dives for a diving certification, those unverified dive logs may not count towards your goal. As a result, they won’t help you earn your desired diving certification.

How to Prepare Yourself for Solo Diving

Solo diving can be safe, but you need to prepare yourself before venturing away from the buddy system. First and foremost, solo diving isn’t something that a beginner should attempt. Only experienced, well-trained divers should attempt to dive alone.

Even if you consider yourself more-experienced and better-trained than the average diver, you should still obtain certification before attempting to dive alone. Specifically, it’s recommended that you take either the PADI Self-Reliant Diver course or the SDI Solo Diver course. By enrolling and completing either of these courses, you’ll learn how to safely dive alone.

Requirements for enrolling in the SDI Solo Diver course include the following:

  • 21 years of age or older
  • SDI Advanced Diver certification or higher
  • 100 or more logged dogs

Requirements for enrolling in the PADI Self-Reliant Diver course include the following:

  • 18 years of age or older
  • PADI Advanced Open Water Diver certification or higher
  • 100 or more logged dives
  • Completion of a skill assessment

When solo diving, stick to recreational depths. While diving in deep water may sound harmless, it’s not something that should be done alone. At depths of around 130 feet or greater, you’ll have to make regular stops for decompression to avoid the bends. By sticking to shallower water, the risk for an injury-causing accident is significantly reduced.

The key thing to remember is that you should obtain either PADI Self-Reliant Diver certification or SDI Solo Diver certification before diving alone. While both of these courses have strict requirements for enrollment, they’ll teach you the skills needed to safely dive without a buddy. After completing the course, you can test your solo diving skills in shallow water with a recreational depth.

Want to create your own custom dive logs? Contact us today to learn more about our custom dive logs.

A dive log is an essential record-keeping tool used in scuba diving. For over a half-century, recreational and professional divers from across the world have used them to record their underwater adventures. After resurfacing, a diver can complete the given fields in a dive log to document his or her experience. The creation of these dive logs offers a journal that divers can reference to assess their past dives.

If you’re new to scuba diving, you might be wondering how to use a dive log. Experienced divers are usually familiar with dive logs, allowing them to quickly and easily complete them. But for newcomers to scuba diving, dive logs can be confusing. By familiarizing yourself with the basic elements of a dive log, though, you can take advantage of this tool and the unique benefits that it offers.

What Is a Dive Log?

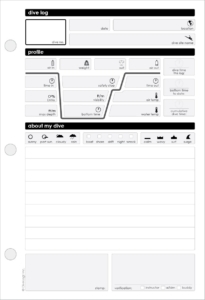
A dive log is a document detailing the conditions and events of a single, specific dive. It features various fields that you can complete to record your diving experience. While different dive logs have different fields and formatting, they all serve the same underlying purpose of recording your dives. When you go diving, you should complete a dive log to create a journal of your experience.

In a dive log, you can record information about a dive, such as the date and location, equipment used, maximum depth, air usage, average depth, bottom time, water temperature, current conditions and more. Even if you have a sharp memory, you probably won’t remember everything about a dive. A dive log allows you to create an accurate record of your dives, which you can use to plan your future dives and, ultimately, become a better diver.

Common Sections of a Dive Log


A standard, non-commercial dive log may contain the six following sections:

  1. Header: Found at the top of the dive log, the header features fields for basic information about the dive, such as the dive number, location, date and time.
  2. Profile: Perhaps the most important section, the profile is used to record information such as bottom time, depth, saturation levels and air usage.
  3. Equipment: As the name suggests, the equipment section is used to record information about the equipment used during the dive. Among other things, you can use this section to record how much weight you used, whether the weights were belt or BCD, size of air tank, material of air tank, wetsuit material and wetsuit thickness.
  4. Conditions: In the conditions section, you can include information about the environmental conditions of the dive, including the water temperature, saltwater vs freshwater, underwater visibility and day vs night.
  5. Comments: Most dive logs feature a comments section where you can include your notes about the dive. Maybe you felt uncomfortably cold during the dive, or perhaps you found the area difficult to navigate. Regardless, you can record these and other thoughts about the dive in the comments section. Some divers also use this section to record the types of fish and marine life they encountered so that they’ll remember which diving locations offered the best experience.
  6. Verification: Also known as the validation section, the verification section is used to verify your dive by a third party. After completing your dive log, you can ask your diving instructor, divemaster or even a buddy to verify your dive in this section. The individual can sign his or her name to verify your dive. With that said, many diving instructors and divemasters use stamps as an alternative to signatures.

In addition to these six sections, dive log books — books featuring dozens or hundreds of individual dive log pages — often feature a separate section for emergency contact and medical information. In this section, you can include the name, address, phone number of an emergency contact, as well as your blood type, any allergies from which you suffer and any medication that you are currently taking.

Hopefully, this doesn’t happen, but if you are injured or otherwise experience a medical injury while diving, the information contained in this section could prove vital towards your treatment and recovery efforts. The dive charter can provide emergency medical professionals with your dive log book to ensure you receive the possible treatment.

When to Use a Dive Log

Unless you’re a professional diver, you aren’t legally required to use a dive log. However, it’s still a good idea to use dive logs because it creates a record of your past dives. No two dives are ever the same, and without dive logs, you may struggle to remember key information about your past dives.

Assuming you dive for recreational or leisure purposes, you can omit certain dives from your dive logs. Many divers, for example, follow the 20-20 rule when using dive logs, which states that only dives 20 feet or deeper with a duration of 20 minutes or longer should be recorded in a dive log. For shallower and/or shorter dives, the information isn’t recorded because it’s not considered a substantial dive.

So, when should you use a dive log? You can either use one with every dive, or you can follow the 20-20 rule. As a beginner, though, completing a dive log for each dive will help you learn the various fields and what they mean. As you become accustomed to using dive logs, you can then switch to the 20-20 rule by only recording dives in which you descent to at least 20 feet and stay underwater for at least 20 minutes.

How to Use a Dive Log

To use a dive log, simply complete all relevant and meaningful fields during your diving trip. While boating out to your dive site, you can go ahead and complete some of the fields in your dive sheet, such as the location and equipment. For others, you’ll have to wait until you resurface to complete them.

But don’t wait too long after resurfacing to complete your dive log. By completing the rest of your dive log immediately or shortly after you resurface, you should remember all the essential information about the dive, which you can include in your dive log. If you wait until the next day to complete your dive log, you may forget details about the dive, thereby reducing the value of this record-keeping tool. Furthermore, if you want your dive log verified — something that’s necessary when seeking certification — a diving instructor, divemaster or buddy must sign or stamp it. To prevent headaches such as this, complete your dive log as soon as possible after you resurface.

When In Doubt, Ask for Help

Don’t be afraid to seek help if you have a question about a particular field or section in a dive log. Most dive charters will gladly offer assistance with your dive log. They can explain what the different fields mean as well as the information to include those fields.

Whether you’re still training for scuba certification, or if you’ve been certified for years, you should get into the habit of using dive logs. Dive logs offer more than just a reference of your past dives. They serve as a journal detailing the unique experience of each dive.

Want to create your own custom dive logs? Contact us today to learn more about our custom dive logs.

By Sandra Kahale

If you’ve been following Dive Logz you’ll know that we recently spent a few weeks in Costa Rica on a Dive Logz work-ation. Dive Logz is a family business, so that kind of thing is easy for us to do. As it happens, our intern, Jolene, has just finished university, and was free to come along. So, we gathered our troops, our scuba gear, and our sense of adventure, and went off to work on new plans, new products, and new content for our fans, away from the distractions of daily life and the deep freeze of Canadian winter.

We had some serious work to do, so we chose a place a little bit off the beaten path: Montezuma, near the southern tip of the Nicoya Peninsula. It’s a small town with some great beaches, amazing waterfalls, lush jungle, and, of course, diving nearby.

Getting there is, as they say, half the fun. We flew into Liberia, packed ourselves into a rather rough-looking 4×4, and hit the road for the 4 ½ hour drive.

The dusty road from Liberia to Montezuma, Costa Rica. 

Things started smoothly, the paved highway almost empty as we headed out early on a Sunday morning. The paving didn’t last, though, and we soon found ourselves on rough, rocky dirt roads with a few precarious drops and many, many construction stops.

Dusty but excited, we arrived at Casa Maya, a pretty swanky house just up the hill from “downtown” Montezuma. The internet was strong, the garden lush and lively, and the plunge pool inviting. It was perfect.

We quickly settled into a routine of early mornings, inspired brainstorms, and twice-a-day trips to the beach to play in waves, snorkel, and explore. It’s the kind of rhythm that digital nomads like us love… an easy, natural lifestyle with lots of room for work and play.

The area offers lots to explore. One memorable morning involved a hike to the famous Montezuma Waterfall, followed by a swim in clear, cool waters.

Dive Logz founder, Peter, stands by the beautiful Montezuma waterfall. 

Another found us at the small pier in nearby Cobano, where fisherman sell their daily catches. But mostly, we could be found at the beach, where the waves rocked or rolled us, depending on the day.

Eating is one of my favorite things, and Costa Rica, it turns out, is a great place to do that. In fact, the Nicoya Peninsula is one of the world’s five “Blue Zones” – where people commonly live past the age of 100. A Costa Rican 60-year old is more likely to reach the age of 90 than anybody else in the world. Fruits, vegetables and fish abound, and the local cuisine showcases them in simple, delicious ways.

We did our part by making starfruit ginger jam with the fruits growing in the yard.

Making starfruit ginger jam in the kitchen of Casa Maya in Montezuma. 

The sun, the sea, the flavours, the pace… we love it all. We were happy. And then, one day, we weren’t.

We’d been in Montezuma about 10 days when two friends from Toronto came to join us. They brought the party, arriving with tons of luggage and some duty-free booze from the airport. We celebrated by going out for dinner – something we hadn’t done yet, since night falls fast and early in Montezuma, and we’d gotten into the habit of working at night so that we could enjoy the beach during the day.

The Dive Logz crew + friends out for dinner.
Little did we know what would happen next…!

We returned, laughing, two hours later. We were piling into the kitchen, pouring night caps, when Peter, suddenly said “where are all the computers?!” We’d left them secured in the safe. But he was standing in front of the safe and the door was jacked open. The computers – four of them in total – were gone. So were the cameras, a phone, an iPad, and some cash. We’d been robbed!

Turns out a safe isn’t really a very safe place to keep your valuables after all. 
We kicked into action immediately, texting the property manager, running upstairs to check the bedrooms, then waiting for the cops to show up, which they did in droves throughout the night. The municipal police came. The “special private investigator” came. The property manager came, then her husband, then her son. The cleaning lady and the pool guy came. It was a circus with a symphony of languages going – English, Spanish, and French – as we all tried to understand each other and make sense of what had happened.
The property manager, police, and others descended on the house the night of the robbery,
taking statements and soothing our fears as best they could.

When everyone had finally gone, we were left in the stillness of a crime scene, with instructions not to touch anything before the police returned the next morning to take fingerprints. They needn’t have worried – we retired to our respective beds, and spent the night sleepless but still, alert to every sound. When the sun finally rose around 5, we’d already been up for hours.

The next morning, Peter and I headed to the police station to make another report. By the time the police followed us home to take fingerprints, we figured the worst of the experience was behind us, and started to relax into the new, unexpected reality that we’d now have no choice but to just be on vacation.

If you’ve ever been robbed, especially in a faraway land where policing is…uh… relaxed, you know that there’s no hope of getting your things back. We had to let go of the “stuff” we’d lost, and so we did, right after a frenzied day or two of changing passwords and securing accounts.

Harder to let go was the emotional side of being robbed – the feeling of not being safe, of not knowing who to trust, of being vulnerable at every turn. We began, without meaning to, to sleep in shifts, so somebody was always awake to the noises in the house. We stopped staying home alone, naturally falling into a high-alert buddy system.

But we also reached out for community, not just with each other, but with the people we’d met, the property manager, the Americans next door, and the very welcoming community of retired expats in Montezuma. We allowed ourselves to be taken under their wings, consoled, and cared for.

We recognized that in a country where poverty is rampant, we’re lucky that we have such valuable things to steal. And while the theft certainly disrupted our lives for several weeks, it’s probably nothing in comparison to the daily lives of people who feel like stealing is their best option.

We decided that the best revenge – and the path to redemption – was to laugh. So that’s what we set out to do.

We started with a bang, chartering Montezuma Crew’s private yacht for a day on the water. It was the perfect antidote to the harrowing days we’d had. They thought of everything and handled all the details. All we had to do was relax.

The Dive Logz crew and friends with our new buddies at Montezuma Crew.
A private yacht day was just what we needed to put the break-in behind us. 

As the crew shared with us, Costa Rica is a great place to learn to dive. So, we sent our intern, Jolene, out on her first dive that day. You can read about her magical experience with Miguel here. Peter got a dive in, too, and even logged his dive in our new waterproof dive log, which was a big hit with the crew.

From there we left Montezuma and the drama of it all behind, and headed to Santa Theresa where we booked into a little hotel in an enclosed compound with security. Finally sleeping again, we were able to enjoy the beach and really drop into the vacation vibe at last.

The beautiful beaches of Santa Theresa, Montezuma. 

We ended our trip 10 days early and headed home to set ourselves up again with computers, and phones, and all of the other gadgets we’d lost. We’re oddly both more and less relaxed than we might have been if we hadn’t been robbed, but we’ve certainly learned a great deal about resilience and how laughter and love really do conquer all.


In the end, we still had each other. And isn’t that all that really matters?

If you live in one of the many places on the planet where winter is thing, we feel you. Us, too.

So, what can we do other than take a deep breath in, find the coat and gloves we put away in the spring, and brace for months of shovelling cars out from under the snow? We can plan a dive vacation!

Winter is one of the best times to go on a scuba-cation. Here are 5 of our top picks for this winter:


1. Maldives:

The Maldives is known for its incredible underwater world, white sandy beaches, and beautiful hotels. Scuba enthusiasts around the globe love this destination!

Wondering what the diving is like? The Maldives are known for big fish and gorgeous coral reefs. This is also a great place for drift diving – you can see amazing hammerheads and tiger sharks.

Winter is the best time to go to this paradise dive destination, with the best visibility and plankton-rich currents.


2. Mozambique:

Mozambique is a water-lover’s paradise. Both the snorkeling and the scuba diving are top rate.

You’ll find tons of great dive sites, crystal waters, and the largest Marine Protected Area on the African continent in this winter escape. From coral reefs teeming with life to mangrove forests and an incredible diversity of sea creatures, there’s a lot to take in along the more than 2000 kilometres/1250 miles of coastline.

Picking a favourite area in this rich environment is tough, but Whale Shark Alley off Praia do Tofo, Inhambane, is a serious contender. This plankton-rich, current-fed corridor attracts whale sharks all year round, so you’re pretty much guaranteed to see them there. That’s definitely one to mark in your travel binder!

Note that Mozambique can be a little more challenging than some other destinations because of strong currents. But the conditions are perfect conditions for drift diving!

3. Bonaire

Bonaire is one of the top diving destinations in the Western hemisphere and is a perfect getaway during the cold winter months. It also offers beautiful landscapes and wildlife areas.Known as the shore diving capital of the world, Bonaire offers some of the world’s best diving, 24/7 diving.

While Bonaire draws in lots of advanced and technical divers, most of its 90+ dive sites are easily accessible even for new divers. Beloved Bonaire dive sites include Hilma Hooker, Bonaire Marine Park, Windsock Seep, and Pink Beach.

While there’s lots to love about diving Bonaire, one of the things we love most is its long-standing track record for environmental conservation and protection. Need more reasons love Bonaire?  Find them here.


4. Micronesia

Looking to escape winter and head to a real tropical paradise? Look no further than Micronesia – an incredible destination that features everything that divers love! With its tiny uninhabited islands, vibrant culture, pristine reefs, temperate waters, great visibility, and amazing variety of marine life, Micronesia is a treasure trove for divers.

A favourite dive site in Micronesia is Chuck Lagoon– possibly the best wreck diving site in the entire world! Here you’ll find a rich World War 2 history to explore, with 200 air crafts and 60 ships beneath the waves. Another favourite, Palauis perfect for the tropical diver. There’s shark diving, wreck diving, and incredible coral reefs. The diverse sea life ranges from manta rays all the way to reef sharks.


5. Red Sea, Egypt

Egypt’s Red Sea has long been one of the world’s top scuba diving destinations. And why not? It’s got warm, clean water, tons of marine life, and lots to see and do! Egypt’s most famous dive spots include Sharm El Sheikh, Hurghada and Marsa Alam. The water may not be as warm as the Maldives, but the cooler streams makes winter the perfect time to spot oceanic whitetips and hammerheads


Are you ready to take that much needed dive-cation? Take your travel friendly scuba log binder with you!

Top 5 Diving Destinations in 2019

Get your passports ready, divers…here are the top 5 diving destinations in 2019:

1. Palancar Horseshoe, Conzumel, Mexico

Palancar Horseshoe is a world renown dive site and for a good reason. It’s stated that Palancar Horseshow is the best diving site in all of Mexico, it has over 3000 5-star ratings on TripAdvisorand the general area is known to be affordable!

Palancar Horseshoe, Conzumel, Mexico | Photo Credit: Kadu Pinheiro

2. Cairns, Australia

Cairnes, Australia, also known as the “Reef Experience” is a diving destination known for its beautiful reef scenery and fish life. This diving site has over 2800 5-star reviews on TripAdvisor. And if visiting Australia for the sole purpose of diving the Cairns then the other local activities and food will seal the deal.

Cairns, Australia | Photo Credit: Fexbot2000

3. Darwin Island, Galapagos

The Galapagos is known for its sea life that can be seen almost year-round, and 20% of the marine life can’t be found anywhere else. Book your flight and be ready for the experience of a lifetime. Darwin Island is full of diving sites that are all unique on their own. The island itself is full of incredible history including an extinct volcano. The Island is found Northwest of the main Galapagos Island and is under the administration of Ecuador.


4. Blue Corner, Palau

Palau is known for its action-packed and stunning diving sites; however, Blue Corner is known as the best diving site in all of Palau. This dive site is best for the experienced diver due to its unpredictable conditions such as the currents. However, this site is best for shark lovers. Cruise along with Gray Reef Shark, and then move towards the sandy channels and experience the turtles, Manta Rays, Large Dogtooth Tuna and tons more. I think its time to pack your bags!

Blue Corner, Palau | Photo Credit: Joseph Tepper


5. Cathedrals (first and Second), Lanai

The Cathedrals in Lanai are known for the offshore ledges, rare species, delicate nature, and amazing sea life. Lanai is found in one of the sixth Hawaiian Islands and has a rich history and amazing outdoor activities for the adventurer. This site has amazing reviews from the TripAdvisor community and is a must see!

Cathedrals, Lanai | Photo Credit: Mar Tamarack

After giving our readers a strong case of wanderlust, let us know what places you really want to dive in 2018, what’s your diving bucket list, and have you visited any of these spots?


Packing Light for Your Next Dive Trip: Our Top 4 Packing Tips

We’ve all been there. Despite the anticipating excitement of your upcoming dive trip, the packing part can be stressful. But it doesn’t have to be. We’ve prepared these top 5 tips to help the packing process:

1. Packing Clothes:You need space, and you have already taken out all the non-necessary items and your now down to the bare essentials. But you still need space in your suitcase or bag. Here’s a revolutionizing packing technique that will change your life: military packing. It’s an army hack that you never knew you needed. It’s the rolling fold technique. Overall, by rolling you reduce wrinkles and can have a more organized travel bag. Check out this great video to learn how to roll

2. Replace the Heavy with the Light: A lot of times you can dupe some of your heavy scuba gear for something more lightweight. If you can, you should. Many companies like Cressi offers scuba gear in a lightweight and travel-friendly form. For example, Cressi offers BCD’s that have the same features as a traditional one but you can have an easier time travelling with it.

3. Is It Collapsible or have Multi-Functions? If you can get the collapsible version for non-essentials, you should. If you can get one thing that can do many, you absolutely should. These items are great for the small but necessary items for your trip. Collapsible water bottlespassport wallet,  travel adapter with duel dual USB ports and more!

4. Is it Travel Friendly? You know what they say, size isn’t everything! Put aside some of your regular sized items and replace them for something that’s durable, lightweight and travel-friendly. Checkout Dive Logz travel friendly and waterproof logbook that can fit into any bag, and be durable against the elements.